Building a Ball Balancing AI in Unity, Part 2
In Part 1 we looked at how to model and integrate an AI that balances a ball on a platform using neural networks and SmartEngine. To recap, this is the AI we are building:

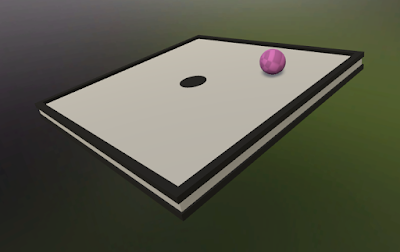
|
| The final, trained AI in action |
When we last left, we had an integrated, functioning AI manipulating the torque on our platform, but we had not trained the AI. The result was that the AI failed miserably at its job because it was essentially giving random output. In this article, we're going to train our AI to produce the results we want. Let's begin!
When you are ready to train an AI, you need to have a plan of attack. The first decision to make is what training methodology to use. SmartEngine provides three high level ways of training: gradient descent, reinforcement learning, and genetic training.
Gradient descent is the tried-and-true method of training where the user supplies a set of inputs and corresponding desired output. Like the name suggests, the gradient of the graph is computed for a given input / output pair and is followed in the negative direction. This works great, but relies on us having a training data set with known good output. In our ball balancing example, we don't know what the output should be. A good mathematician could figure it out, but if we did figure it out, we wouldn't need our AI to begin with. I'm not a good mathematician, so we need to look for other solutions. One other possible way to get the data would be to record ourselves maniuplating the platform with a controller. That works, but we would first need to get very skilled at the process in order to have the best possible data. If we aren't playing optimally, the AI will learn suboptimal behaivor. No, gradient descent isn't the best solution here. Let's look at the other methodologies.
Reinforcement learning is the latest hotness in the game AI research space. The basic idea is that we let the AI repeatedly play our game, and as it does, we give it positive and negative rewards for good and bad behavior. The trainer then adjusts the weights in the graph such that the AI maximizes its rewards. This is seems like it could fit our needs. Each frame, we give the AI a reward inversely proportional to how close the ball is to the center. The closer the ball is to the center, the more reward it gets. Reinforcement learning works best when the environment is stable and repeatable. The trainer relies on the same initial conditions each run through of the game. Here, this means that we drop the ball from the same position(s) each training episode. Not a huge deal - we pick a set of starting ball positions that are representative of what the user might choose with the idea that at the end of training, the AI will have learned enough about the problem space that it can handle any starting position. Reinforcement learning certainly works here, but it is not the approach taken with this example. Instead, we will look at the final methodology SmartEngine provides.
Genetic training is a less researched area in machine learning, but it is a methodology that SmartEngine excels at. Just as neural networks attempt to mimic the structure of the brain, genetic training attempts to mimic the real-life process of evolution. To begin, a popluation of graph variations, called chromosomes, are created with random weights. For each generation, the chromosomes are assigned a score, usually by playing the game. This is similar to reinforcement learning, and in fact, the same rewards can be used. However, genetic training can work off any sort of custom score value. For instance, an absolute score might not be used, but rather one that is relative to the other chromosomes in the population. After scoring, the chromosomes are sorted and the learning begins. The bottom set of performers are thrown out and replaced with new variations. These new variations contain a mixture of weights from the previous generation along with random mutations. The mixing of weights is a way to spread good behavior throughout the population and the random mutations are really what allow the population to reach better scores. The process then repeats until we have reached our desired results.

|
| The genetic training cycle |
Population size can vary, but the larger the population, the better the results and the fewer the generations. Of course, a larger population means more computation, so there is a tradeoff to be made for best overall training time. In this example, we will be using a population size of 300. One great property of genetic training is that it is highly parallelizable. Each chromosome is independent of the rest and can be trained on a separate game instance and even on a separate computer. Azure and AWS become really handy for reducing training times if you can afford it.
SmartEngine takes care of chromosome generation; we just need to implement the scoring function. To aid us, SmartEngine comes with helper classes to take care of the common code. We will be using a training harness that can assign one or more chromosomes to one or more tasks, which are distributed to connected game instances. We get to define the structure and operation of the task. As alluded to above, each task will be a short simulation of the game and we will score the chromosome based on the movement of the ball. When the task begins execution, we will assign the task's chromosome data to our AI and position the ball above the platform. We will then drop the ball and simulate for a short period of time.

|
| Genetic training structure. A genetic trainer holds a population of chromosomes, which are assigned tasks (ex: play 30s of the game). Tasks are distributed to connected game instances, which can run on multiple machines. |
Enough high level overview. Let's dive into some code.
public class PlatformGeneticTrainer :
    GeneticTrainingHarness<PlatformGeneticTrainer.TrainingTask,
                           PlatformGeneticTrainer.ChromosomeData>
{
We define our class by extending from the SmartEngine genetic training harness. This is a MonoBehaviour class, so we can place our trainer on a GameObject and assign properties. The base class takes care of all the networking code and the boilerplate code needed to set up the main training loop. We pass in our training task and chromosome data classes as template args. Let's look at those.
/// <summary>
/// The data we record for each chromosome (AI variation) across all trials.
/// More data is recorded than used to score so you can play with different scoring functions.
/// </summary>
public class ChromosomeData : Helpers.ChromosomeData
{
    public List<float> Losses = new List<float>();
    public int Steps;
    public float SimulationTime;
    public float PositionLoss;
    public bool Failed;

    public override void Reset(int index)
    {
        // ...
    }

    public override void MergeData(SmartEngine.Helpers.ChromosomeData data)
    {
        Losses.Add(((ChromosomeData)data).ComputeTaskLoss());
    }

    public override void Serialize(MemoryBuffer writer)
    {
        // ...
    }

    public override void Deserialize(MemoryBuffer reader)
    {
        // ...
    }

    public override float ComputeLoss()
    {
        return Losses.Average();
    }

    private float ComputeTaskLoss()
    {
        return PositionLoss / PlatformGeneticTrainer.TrialLengthSeconds;
    }
}
This class holds data we store for every chromosome in the trainer's population. This is coming directly from the example code, and as the comment suggests, we collect a lot more data than we need to allow coders like yourself to easily play around with different scoring functions.
We have a copy of the chromosome data on the server and the client. During the execution of the task, the client writes to its copy of the data. After the task is complete, the data is serialized and sent to the server. The server deserializes the data and calls MergeData() to aggregate it into the collective whole. It's important to remember that a single chromosome can be part of many tasks. Even when training in a single game instance, a server / client relationship is established. Both the client and server will be on the same class instance, but it's important to treat them as if on separate machines.
The main data of interest are Losses and PositionLoss. The term "loss" can be thought as the score we give. It's important to know that the genetic trainer always considers the chromosome with the lowest loss value as the best. When merging data, we append the loss from the task into a list. The task's loss is computed in ComputeTaskLoss(), where we take the position loss and average it over the task's game length. We will see later that the position loss is an adjusted cumulative sum of the ball's position from center over the course of the game.
After all the tasks have been completed, the training harness will automatically call ComputeLoss() to get the final loss for each chromosome. We simply return the average loss from all our chromosome's tasks.
public class TrainingTask : GeneticTrainingTask
{
    public byte[] GraphData;
    public Vector3 BallPosition;

    public override void Serialize(MemoryBuffer writer)
    {
        base.Serialize(writer);

        writer.Write(GraphData);
        writer.Write(BallPosition);
    }

    public override void Deserialize(MemoryBuffer reader)
    {
        base.Deserialize(reader);

        GraphData = reader.ReadByteArray();
        BallPosition = reader.ReadVector3();
    }
}
This class defines the data that is sent from server to client for each task. In it, we have the graph data of the chromosome we are training and the starting ball position for the simulation.
Let's look at some of the server code.
protected override void CreateTrainer(bool newTrainer, out GeneticTrainer trainer, out Graph graph)
{
    Context context = new Context();
    {
        Graph.CInfo cinfo = new Graph.CInfo();
        cinfo.ResourceName = PlatformGraphModelView.cDefaultGraphResourceName;
        cinfo.Context = context;
        graph = Graph.CreateFromResource(cinfo);
    }

    if (newTrainer)
    {
        graph.SetRandomWeights();
    }

    {
        GeneticTrainer.CInfo cinfo = new GeneticTrainer.CInfo();
        cinfo.ResourceName = "PlatformTrainer";
        cinfo.Context = context;
        cinfo.Graph = graph;
        trainer = new GeneticTrainer(cinfo);
    }

    if (newTrainer || trainer.LastLoadResult != SerializationResult.Success)
    {
        GeneticTrainerInitializationInfo info = new GeneticTrainerInitializationInfo();
        info.PopulationCount = 300;
        trainer.Initialize(info);
    }

    {
        _trainingInfo.CountTopPerformers = -2.0f;
        _trainingInfo.Mutation.StepsUntilLowerStandardDeviation = 1;
        _trainingInfo.Mutation.StepsUntilRaiseStandardDeviation = 1;
        trainer.SetTrainingInfo(_trainingInfo);
    }
}
This is called by the harness when training starts. Here, we create the graph to train and also the trainer. Some lines of interest are highlighted in bold. The first is where we specify how many chromosomes are in the population. The last three lines are setting a special property of the genetic trainer. The trainer can auto adjust the mutation rate as learning progresses to speed up learning and improve results. Here we are saying that we should consider the top two spots to be our best performers. Then we specify that we should change the mutation rate every generation. By tweaking the last two lines, we could specify that we want to change the rate only after seeing (or not) a new top performer X times in a row. More can be said about these values in another article, but for now, know that these are good values to start with in general.
protected override void AddTasks()
{
    CreateBallPositions();

    // Each chromosome (AI variation) runs through _trialCount number of random ball positions.
    // The positions are the same for each chromosome for fairness.
    for (int c = 0; c < _trainer.PopulationCount; c++)
    {
        for (int t = 0; t < _trialCount; t++)
        {
            TrainingTask task = new TrainingTask();
            task.ChromosomeIndices.Add(c);
            task.BallPosition = _ballPositions[t];
            AddTask(task);
        }
    }
}
This next method gets called right before we start handing out tasks to connected clients. Here, we are assigning _trialCount number of tasks to each chromosome. But first we update the ball position array. The array is randomized the first generation, but after that point we only randomize one position and throw out one position. By keeping most of the values the same, we can ensure that future generations still perform as well as the previous generation. This property get less useful as population size grows. If we have a population size of 20, we really want to make sure we have accurate performance results when choosing who to throw out. In that case, a high number of trials is needed. With our population size of 300, enough chromosomes will remain after each generation that it's not as important if we accidently throw out some okay ones, so a trial count of 1 works fine. We are favoring less computation and faster training by sometimes throwing out chromosomes that had a one-off bad trial but might have been overall good in others.
protected override void OnTaskReadyForClient(Connection client, TrainingTask task)
{
    _trainer.SetChromosome(task.ChromosomeIndices[0]);
    _graph.Serialize(out task.GraphData);

    base.OnTaskReadyForClient(client, task);
}
This is the final method in the server code. This method gets called right before a task is handed to a client to execute. We have a final chance here to inject data into the message. Here, we are extracting the graph for this particular chromosome and putting it in the message. SetChromosome() will replace the weights in the graph we passed in during trainer construction (_graph in this case).
Now let's look at the client code
protected override void StartTrainingAsClient()
{
    {
        Graph.CInfo cinfo = new Graph.CInfo();
        cinfo.ResourceName = PlatformGraphModelView.cDefaultGraphResourceName;
        cinfo.Context = new Context();
        _clientGraph = Graph.CreateFromResource(cinfo);
    }

    Scene.Instance.GraphManager.RegisterModelFromGraph(_clientGraph, PlatformGraphModelView.cDefaultModelName);

    Scene.Instance.TrainingInProgress = true;

    Physics.autoSimulation = false;

    base.StartTrainingAsClient();
}
When we first connect as a client, we need to create and register a graph that the AI will use in the simulation. This cannot be the same as the graph we passed to the trainer constructor because that is only created on the server. We register with the graph manager, which we saw in the previous article. The platform's controller will automatically start using this new graph because it's registered under the same name.
protected override IEnumerator TrainChromosomes(TrainingTask task)
{
    _clientGraph.Deserialize(task.GraphData);

    _platform.ResetPlatform();
    _ball.ResetBall(task.BallPosition);

    ChromosomeData clientData = ClientChromosomeData[task.ChromosomeIndices[0]];

    while (clientData.SimulationTime < TrialLengthSeconds)
    {
        Scene.Instance.UpdateNetworks(Time.fixedDeltaTime);

        Physics.Simulate(Time.fixedDeltaTime);

        // The physics joint on the platform is subject to a little translation.
        // Reset the position here for more consistent results
        _platform.ResetPosition();

        clientData.Steps++;
        clientData.SimulationTime += Time.fixedDeltaTime;

        // Position Loss. This makes up the majority of the loss. The critical component
        // here is the square root. It ensures closer distances get much lower loss.
        {
            clientData.PositionLoss += Mathf.Sqrt((_ball.transform.position - _ballTarget.position).magnitude);
        }

        // If the ball goes out of bounds or drops below the platform, immediately bail out.
        // This happens a lot in the early stages of learning (random weights). The lower
        // simulation time will increase the overall loss significantly.
        {
            Vector3 pos = _ball.transform.position;
            if (pos.y < -0.5f ||
                pos.x > 1.0f || pos.x < -1.0f ||
                pos.z > 1.0f || pos.z < -1.0f)
            {
                clientData.Failed = true;
                clientData.PositionLoss += 3.0f * ((TrialLengthSeconds - clientData.SimulationTime) / Time.fixedDeltaTime);
                yield break;
            }
        }

        yield return null;
    }
}
This is the meat of the trainer - the task game loop. We take in a task from the server and reset the game state. The client graph's weights are updated with the chromosome's weights. We then spin in a while loop for a fixed amount of time - the length of one game simulation. During this loop, we step the AI controller and step Unity's physics. After that, we increment the position loss in the client's chromosome data. The loss is the square root of the distance to the origin. We use the square root so that we much prefer values that are closer to the center. This is less important when only training one task per chromosome because the square root function is a strictly increasing function.
One small optimization is to check if the ball has fallen beneath the platform. As we saw at the end of the previous post, this tends to happen when we first start training. Having this check allows the first handful of generations to go quickly, but is not strictly necessary.
At the end of each loop iteration, we yield back to the training harness. This is to keep the UI and app responsive during training. We are training faster than real-time. Each 30 seconds of game time might only take half a real second to execute, but it's still important to take breaks to keep the UI from hanging. The training harness will automatically execute for 10 ms or so a frame before handing back to Unity until the next frame.
After the task is complete, the training harness automatically serializes the client chromosome data and hands it back over to the server to be merged. Once all tasks have been completed, the trainer is stepped and the process starts again. Do this for 200 or so generations and we'll reach a point where the overall loss isn't coming down much, so we call it done!
That's pretty much to it. It's a bit lengthy to talk about the process, but all in all, there's not too much code. As mentioned before, the code and assets for this project can be found on GitLab.. Hope you all enjoyed and I'll see you in the next post!

Comments
Post a Comment